
AI Watch Folders
AI watch folders use artificial intelligence to automatically determine the best folder location and file name for each incoming document. Unlike standard watch folders that dump everything into a single destination, AI watch folders analyze each file and sort it intelligently.
Key difference from standard watch folders: Standard watch folders import into a single folder. AI watch folders operate at the top-level file cabinet and use AI to decide which folder within that cabinet each document belongs in, and what it should be named.
How It Works
- You point an AI watch folder at a source directory on your server.
- You assign it to a top-level file cabinet in DocuMan (not a specific folder).
- When a new file arrives, DocuMan sends it to the configured AI connection (self-hosted or cloud).
- The AI analyzes the document content — either by reading the image directly (vision mode) or by processing extracted OCR text.
- Based on your folder mode and template, the AI determines the best folder location and suggests a file name.
- The document is placed in the Review Queue. If auto-approve is enabled and the confidence meets your threshold, it's filed automatically.
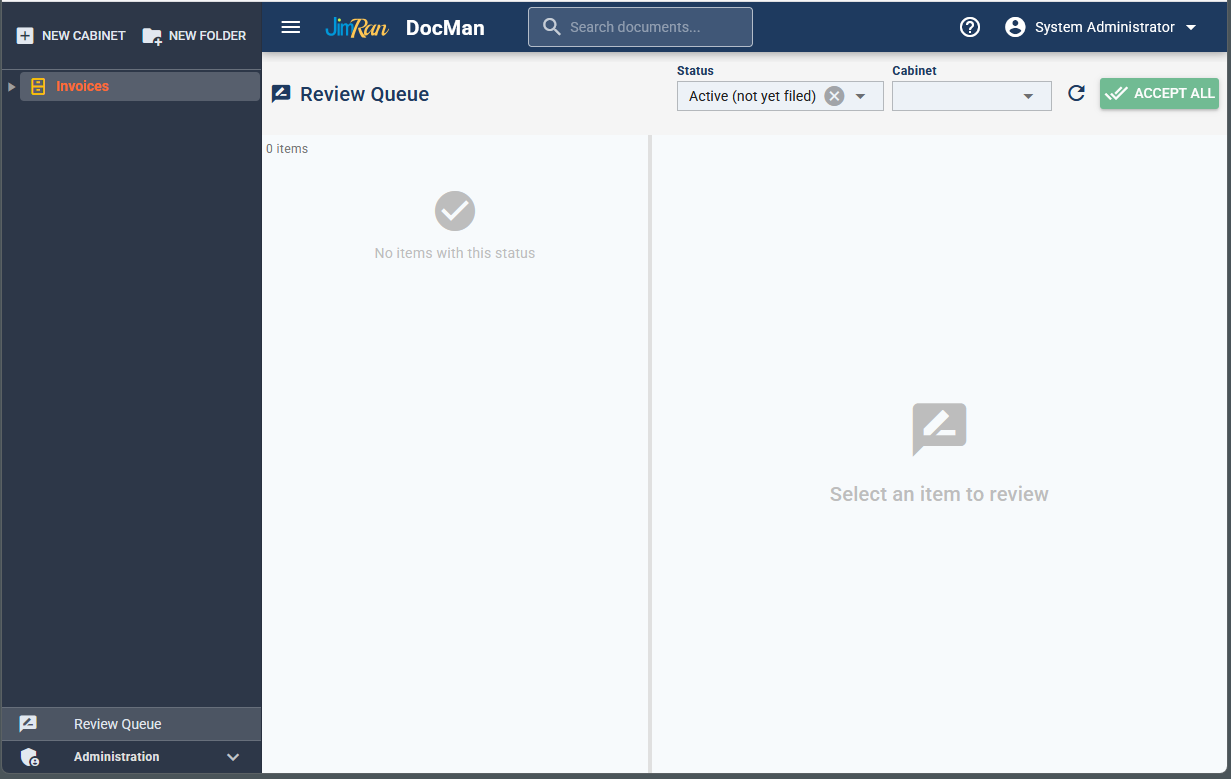
The Review Queue — AI-suggested filings are reviewed here before final placement.
Setting Up AI Connections
Before creating AI watch folders, you need at least one AI connection. Navigate to Administration → AI Connections in the left sidebar.
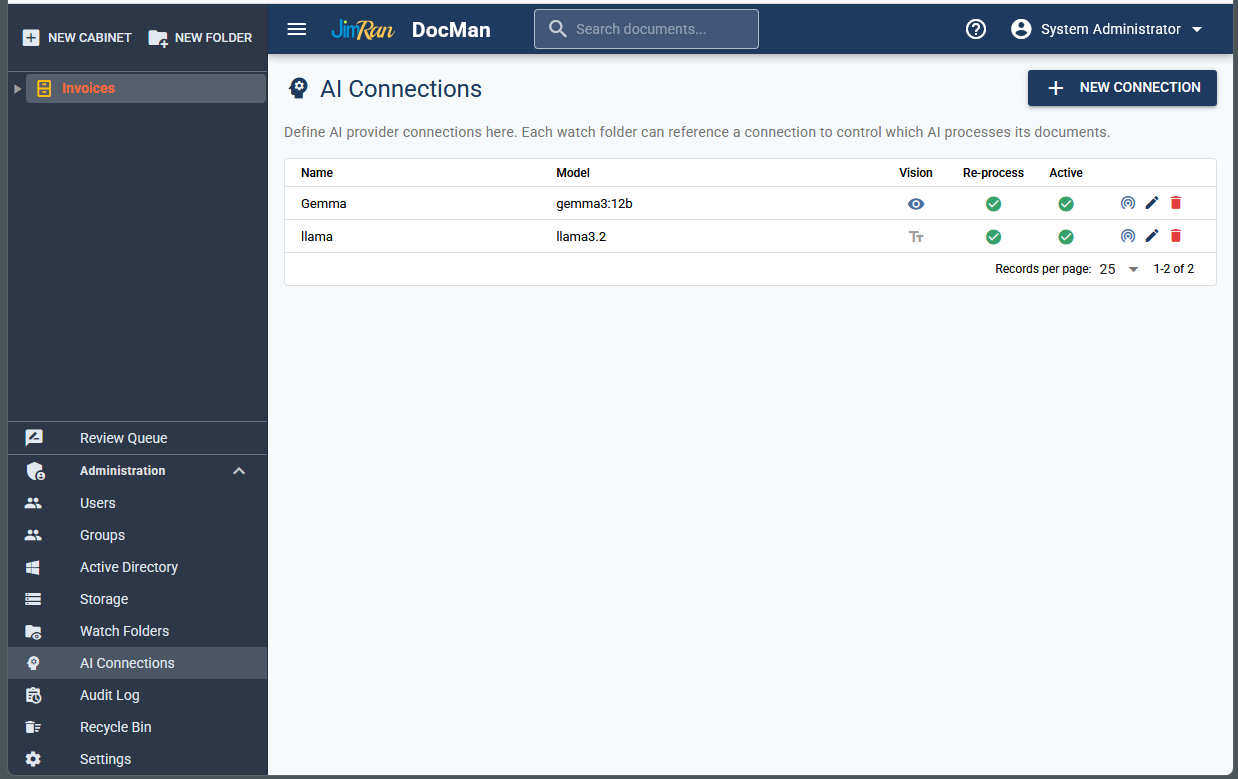
AI Connections page — configure your self-hosted Ollama models or cloud AI providers here.
Each connection defines:
- Name: A friendly label (e.g., "Gemma", "llama").
- API URL: The endpoint (e.g.,
http://localhost:11434for Ollama). - Model: The model name (e.g.,
gemma3:12b,llama3.2). - Vision: Whether the model supports image input (direct page analysis).
- Re-process: Allow re-running AI on previously processed documents.
Folder Naming Modes
AI watch folders support two folder modes, configured per cabinet in Cabinet Settings → AI Settings → Filing.
Mode 1: Existing Folders (Pre-Defined)
The AI receives a list of all existing folders in the cabinet and picks the best match. No new folders are created. This is ideal when you have a known, fixed set of categories — like a medical chart with standard sections.
Example: Medical chart cabinet
Patient: John Smith
  ├── Demographics
  ├── Insurance
  ├── Lab Results
  ├── Radiology
  ├── Progress Notes
  ├── Prescriptions
  ├── Referrals
  └── Correspondence
When a lab report is scanned, the AI reads the document, identifies it as a lab result, and files it into Lab Results. A referral letter goes into Referrals. The folders are never created or modified — the AI just picks the best match from what already exists.
Example: Accounting cabinet
Accounting
  ├── Invoices
  ├── Receipts
  ├── Bank Statements
  ├── Tax Documents
  ├── Payroll
  └── Contracts
Mode 2: Template (Auto Folder Creation)
You define a folder structure using a template with tokens. The AI extracts values from each document (company name, date, document type, etc.) and builds the folder path automatically. Folders are created as needed.
The folder template is configured in Cabinet Settings → AI Settings → Filing → Folder Template.
Indexes — Choosing What the AI Extracts
Each cabinet picks a set of indexes — the fields the AI is asked to extract from every document. Indexes are the unit of opt-in, and they do double duty:
- They drive the AI request. Only fields whose index is selected are asked for in the JSON response. Everything else is skipped, which keeps prompts short and AI cost low.
- They drive folder + filename templates. Only variables from selected indexes resolve in your templates. If
<InvoiceNumber>isn't selected as an index for the cabinet, that token comes back empty.
Where to configure: Cabinet Settings → AI Auto-Import → Indexes section → Choose Indexes… button.
Per-Variable Selection
Each template variable is its own selectable index. <Company> and <CompanyFirstLetter> are separate checkboxes — you can pick one without the other. The Choose Indexes dialog is organized into four groups:
- Document Date — sub-grouped by Full date forms, Year, Month, Day, and Quarter / Week. All map to the same underlying date the AI returns, so the AI is only asked for the date once regardless of how many components you pick. The worker derives every component (year, month, day, quarter, ISO week, day name, …) locally from that single value.
- Document Fields — Company, CompanyFirstLetter, Amount, DocType.
- Numbers & IDs — InvoiceNumber, PONumber, AccountNumber, ReferenceNumber, CustomerID, VendorCode.
- Other — Description, Subject, Currency.
Always-on indexes (Scan Time, Import Date, Original Filename) never appear in the picker because they're computed locally with no AI cost — their tokens are always available.
Custom (Per-Cabinet) Indexes
If the built-in set doesn't cover something your business cares about, define your own custom index for the cabinet. In the Choose Indexes dialog, under Custom (this cabinet), click + Add custom index and fill in three fields:
- Index Name — the template token, written as CamelCase with no spaces (e.g.
PatientChartNumber,ProjectCode). Must start with a letter, max 64 characters, letters / digits / underscores only. It also can't collide with any built-in variable name. - Display Label — how it shows in the picker chip and the Review Queue editor (e.g. "Patient Chart Number").
- AI Description — one short sentence used as the extraction rule sent to the AI ("The six-digit chart number printed at the top right of every medical record").
Once defined, the custom index behaves exactly like a built-in one: it appears as a chip in the Indexes section, its <CustomName> token shows up in the < autocomplete on both template fields, and its value is included in the AI request and the Review Queue editor when selected. The index name is immutable — rename by deleting and re-adding.
The Help Sidebar Filters to Your Selection
When you're editing folder or filename templates, the help sidebar on the right lists only the variables from indexes the cabinet has selected. There's a callout at the top spelling this out. To grow or shrink the list of available variables, change your selection in the Indexes section — the help updates in lockstep.
Default Behavior on New Cabinets
Brand-new cabinets start with <Company> pre-selected. You can deselect it like any other index if the cabinet doesn't need a company field. Empty folder and filename templates are also the default — you build them with whichever variables you've enabled.
Review Queue Editing
When AI-suggested filings land in the Review Queue, the editor renders one row per selected index, with a few rules:
- Date variables collapse to a single Document Date input. No matter how many date indexes you've selected, you edit one date. When you click Fix, the worker re-derives every selected subfield (Year, Quarter, Week Number, …) from your edit and re-runs the templates.
- Non-date variables each get their own input.
<Company>and<CompanyFirstLetter>are independently editable — the AI suggests the first letter from the company name, but you can override it (e.g. when a vendor name starts with "The"). - Custom-index values show with their display label followed by "(custom)" so they're easy to distinguish.
- The filename is always independently editable regardless of what the template produced.
- Fix re-runs only the templates, never the AI. It's free and instant. Edit values, click Fix, the suggested folder + filename update.
After you approve a document, every index value is mirrored into dm_document_tags against that document so the data stays queryable long after the review-queue row is gone.
Folder Template Tokens
Tokens come in three groups: AI-extracted fields (need the matching index selected), smart-date components (also need a date index selected; fall back to the import date when no document date is extracted), and always-on computed tokens (Scan Time, Import Date, Original Filename — available with no AI cost).
Tokens are placeholders wrapped in angle brackets that get replaced with AI-extracted values. You combine them with / to build folder paths.
AI-Extracted Field Tokens
Each row below corresponds to an index in the Choose Indexes dialog. The token only resolves when that index is selected on the cabinet.
| Token | Description | Example Output |
|---|---|---|
<Company> | Full company or vendor name (sanitized for the file system). | Acme Corp |
<CompanyFirstLetter> | First letter of the company name, uppercase. Independently editable in the Review Queue. | A |
<Amount> | Primary dollar amount on the document. | 1,250.00 |
<DocType> | invoice / receipt / contract / letter / statement / report / form / other. | invoice |
<InvoiceNumber> | Invoice number printed on an invoice or billing statement. | INV-1234 |
<PONumber> | Purchase order number referenced on invoices, packing slips, or receipts. | PO-90210 |
<AccountNumber> | Customer or vendor account number on statements, bills, or notices. | ACCT-77881 |
<ReferenceNumber> | Reference / tracking / claim / transaction id. | 1Z999AA10123456784 |
<CustomerID> | Customer or patient identifier (member id, account id, patient number). | CUST-4567 |
<VendorCode> | Short vendor code, often an internal mnemonic. | MCK |
<Description> | One-line summary of what the document is about. | Invoice for office supplies |
<Subject> | Subject line or document title (useful for letters and emails). | Renewal Notice |
<Currency> | ISO currency code of the primary amount. | USD |
<DocumentName> or <DocName> | Original filename as it arrived from the watch folder. Always available (no index needed). | scan_001.pdf |
Date Tokens
Date tokens are smart — they use the document date extracted by the AI first, and fall back to the import date if no document date is found. The AI is only ever asked for one date per document; every subfield below is derived locally.
| Token | Description | Example Output |
|---|---|---|
<Date> | Full date in YYYY-MM-DD format. | 2026-04-20 |
<YYYY> or <Year> | 4-digit year. | 2026 |
<YY> | 2-digit year. | 26 |
<Month> | Full month name. | April |
<MM> | 2-digit month number. | 04 |
<M> | Month number, no leading zero. | 4 |
<DD> | 2-digit day of month. | 20 |
<D> | Day of month, no leading zero. | 20 |
<Day> or <DayOfWeek> | Day of week name. | Sunday |
Document-Date Specific Tokens
Variants that come from the AI-extracted document date only (no fallback to import). Pick these when you want filenames or folders that only reflect the document's own date.
| Token | Description | Example Output |
|---|---|---|
<DocDate> or <DocISO> | Document date in YYYY-MM-DD. | 2026-04-20 |
<DocYear> / <DocYYYY> | 4-digit document year. | 2026 |
<DocYY> | 2-digit document year. | 26 |
<DocMonth> / <DocMM> | 2-digit document month. | 04 |
<DocM> | Document month, no leading zero. | 4 |
<DocMonthName> | Document month name. | April |
<DocDay> / <DocDD> | 2-digit document day. | 20 |
<DocD> | Document day, no leading zero. | 20 |
<DocDayName> | Document weekday name. | Sunday |
<DocQuarter> | Document calendar quarter. | Q2 |
<DocWeekNumber> | Document ISO week number (01–53). | 17 |
Pre-Built Date Format Tokens
| Token | Example Output |
|---|---|
<YYYY-MM-DD> | 2026-04-20 |
<MM/DD/YYYY> | 04/20/2026 |
<MM-DD-YYYY> | 04-20-2026 |
<YYYYMMDD> | 20260420 |
Import Date Tokens
Date tokens from the import timestamp only. Always available with no AI cost (no index selection needed).
| Token | Description |
|---|---|
<CreatedDate> | Import-timestamp date YYYY-MM-DD. |
<CreatedYear> / <CreatedMonth> / <CreatedDay> | 4-digit year / 2-digit month / 2-digit day of the import timestamp. |
Scan Time (Now) Tokens
The instant the template resolves. Useful for guaranteed-unique filenames using nanosecond-precision timestamps. Always available; no index needed.
| Token | Description | Example Output |
|---|---|---|
<Now> | Resolution time YYYY-MM-DD HH:MM:SS. | 2026-06-07 09:42:18 |
<NowDate> / <NowTime> | Date-only / time-only forms. | 2026-06-07 / 09:42:18 |
<NowISO> | ISO 8601 with timezone offset. | 2026-06-07T09:42:18-05:00 |
<NowYear> / <NowMonth> / <NowDay> | 4-digit year / 2-digit month / 2-digit day. | 2026 / 06 / 07 |
<NowHH> / <NowMin> / <NowSec> | Hour (24-hr) / minute / second. | 09 / 42 / 18 |
<NowMillis> / <NowMicros> / <NowNanos> | Sub-second fractional part, 3 / 6 / 9 digits. | 123 / 123456 / 123456789 |
<NowEpoch> | Seconds since the Unix epoch. | 1780000938 |
<NowEpochMillis> / <NowEpochMicros> / <NowEpochNanos> | Epoch in milli / micro / nanoseconds. | 1780000938123456789 |
Guaranteed-unique filenames: append <NowEpochNanos> to a filename template. Nanosecond precision is more than enough to ensure no two filings collide even at extreme volume.
Folder Structure Examples
Below are common folder templates and the structures they produce. Each example shows how DocuMan would organize an "Invoices" cabinet receiving documents from multiple vendors.
<CompanyFirstLetter>/<Company>/<YYYY>
Alpha prefix / Company name / Year. Best for large volumes — the alphabetical prefix keeps the top level manageable when you have hundreds of vendors.
Invoices                          (Cabinet)
  ├── A                           (<CompanyFirstLetter>)
  │   ├── Acme Corp               (<Company>)
  │   │   ├── 2025                (<YYYY>)
  │   │   └── 2026
  │   └── Alberts Machinery
  │       └── 2026
  ├── B
  │   └── Big Signs Plus
  │       └── 2023
  ├── E
  │   └── East Repair Inc.
  │       └── 2019
  └── T
      └── Townplace Roadhouse
          └── 2026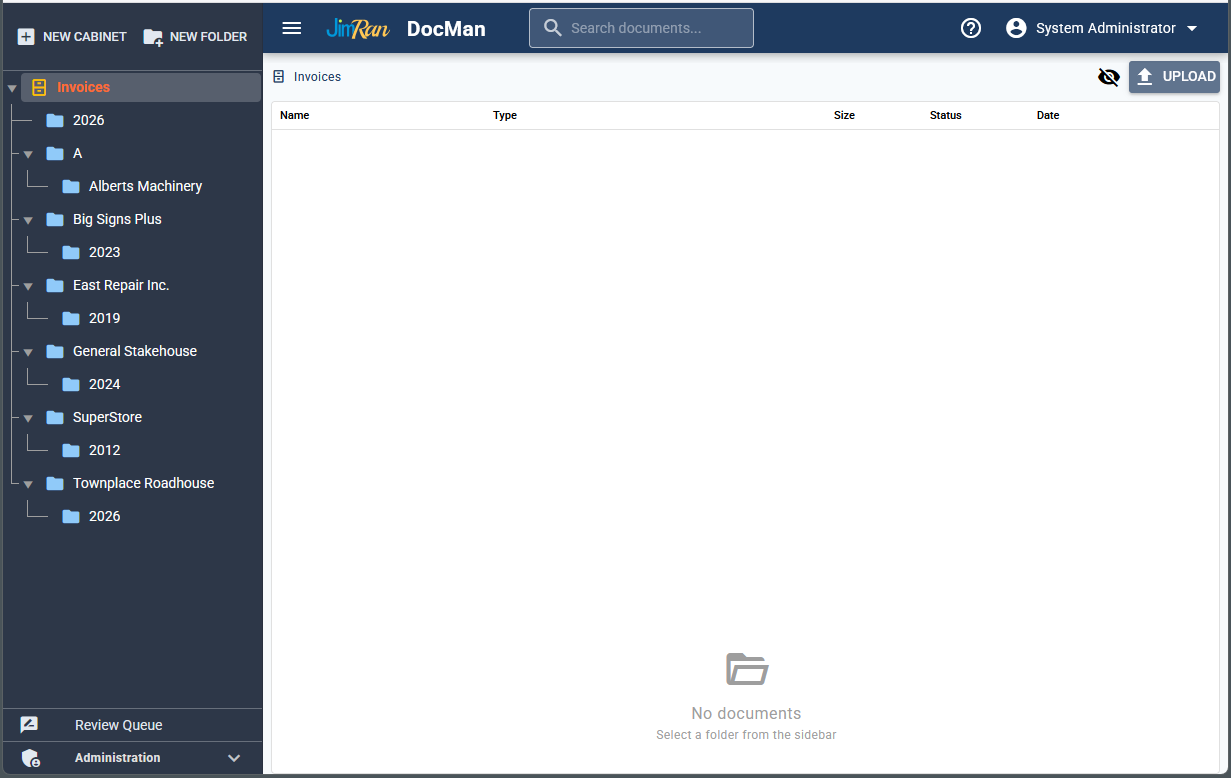
A real DocuMan cabinet using AI-generated folder structures. Note the alpha prefix "A" with "Alberts Machinery" nested underneath, and company/year folders throughout.
<Company>/<YYYY>
Company name / Year. Simpler layout that works well when you have a manageable number of entities (under ~50).
Invoices                          (Cabinet)
  ├── Acme Corp                   (<Company>)
  │   ├── 2025                    (<YYYY>)
  │   └── 2026
  ├── Big Signs Plus
  │   └── 2023
  ├── East Repair Inc.
  │   └── 2019
  └── Townplace Roadhouse
      └── 2026
<YYYY>/<Company>
Year / Company name. Year-first makes it easy to archive or close out an entire year. Good when time is the primary way you think about your documents.
Invoices                          (Cabinet)
  ├── 2019                        (<YYYY>)
  │   └── East Repair Inc.        (<Company>)
  ├── 2023
  │   └── Big Signs Plus
  ├── 2025
  │   └── Acme Corp
  └── 2026
      ├── Acme Corp
      ├── Alberts Machinery
      └── Townplace Roadhouse
<Company>/<YYYY>/<MM>-<Month>
Company / Year / Month. Most granular. Useful for high-volume operations where you need to locate documents by vendor and month — like accounts payable departments processing hundreds of invoices per month.
Invoices                          (Cabinet)
  ├── Acme Corp                   (<Company>)
  │   └── 2026                    (<YYYY>)
  │       ├── 01-January          (<MM>-<Month>)
  │       ├── 02-February
  │       ├── 03-March
  │       └── 04-April
  └── Big Signs Plus
      └── 2023
          ├── 09-September
          └── 11-November
Where to configure: Right-click a cabinet in the sidebar → Cabinet Settings → AI Settings → Filing section. Set the Folder Structure dropdown to "Use a template to build folder path" and enter your template in the Folder Template field.
AI Processing Modes
Each AI connection can operate in one of two processing modes, configured in the AI connection's Vision setting.
| Mode | How It Works | Best For |
|---|---|---|
| Vision (Image) | The document page is sent as an image directly to the AI model. The model reads the content visually, including layout, logos, letterheads, and handwriting. | Scanned documents, faxes, forms with layouts that matter, documents with logos or letterheads that help identify the source. |
| OCR Text Only | DocuMan first extracts text via Tesseract OCR, then sends only the extracted text to the AI model. Faster and uses less GPU memory. | Clean, text-heavy documents like invoices, letters, and reports. Works well with smaller AI models or lower-powered hardware. |
Recommendation: Start with OCR Text mode if you're running a smaller GPU or want faster processing. Switch to Vision mode for documents where visual layout matters (forms, mixed-format documents, or when OCR quality is poor). The gemma3:12b model supports both modes; llama3.2 supports OCR text only.
Self-Hosted AI with Ollama
DocuMan integrates with Ollama for fully self-hosted, on-premise AI processing. No data leaves your network. Ollama runs AI models locally on your server's GPU (or CPU, though GPU is strongly recommended).
Recommended Models
| Model | VRAM Required | Best For |
|---|---|---|
| gemma3:12b | ~8 GB | Best overall accuracy. Supports both vision and OCR text modes. Recommended for dedicated servers with a modern GPU (RTX 3060 12GB or better). |
| llama3.2 | ~4 GB | Good accuracy with lower hardware requirements. OCR text mode only. A solid choice for workstations or servers with a lower-end GPU (GTX 1660, RTX 3050, etc.). |
Installing Ollama on Windows
-
Download the installer
Go tohttps://ollama.com/download/windowsand download the Windows installer. -
Run the installer
RunOllamaSetup.exeand follow the prompts. Ollama installs as a background service and starts automatically. -
Verify installation
Open a terminal (Command Prompt or PowerShell) and run:
You should see the installed version number.ollama --version -
Pull a model
Download the recommended model:
Or for lower-powered hardware:ollama pull gemma3:12b
The download may take several minutes depending on your internet connection.ollama pull llama3.2 -
Test the model
Verify the model is working:
You should get a response. Pressollama run gemma3:12b "Hello, are you working?"Ctrl+Dto exit. -
Configure DocuMan
In DocuMan, go to Administration → AI Connections and click New Connection. Set:- Name: Gemma (or any label)
- API URL:
http://localhost:11434 - Model:
gemma3:12b(orllama3.2) - Vision: Enable for
gemma3:12b, leave off forllama3.2
Installing Ollama on Linux Mint
-
Install Ollama
Open a terminal and run:
This installs Ollama and registers it as a systemd service.curl -fsSL https://ollama.com/install.sh | sh -
Verify installation
ollama --version -
Check that the service is running
You should seesudo systemctl status ollamaactive (running). If not:sudo systemctl start ollama sudo systemctl enable ollama -
Install NVIDIA drivers (if using a NVIDIA GPU)
Linux Mint includes a Driver Manager. Open it from the application menu and install the recommended NVIDIA driver. Reboot after installation.
Verify the GPU is detected and shows available memory.nvidia-smi -
Pull a model
Or for lower-powered hardware:ollama pull gemma3:12bollama pull llama3.2 -
Test the model
ollama run gemma3:12b "Hello, are you working?" -
Configure DocuMan
In DocuMan, go to Administration → AI Connections and create a new connection with the Ollama URL set tohttp://localhost:11434(or the server's IP if DocuMan runs on a different machine) and select your model.
Remote Ollama: If you run Ollama on a separate machine from DocuMan, set the OLLAMA_HOST environment variable to 0.0.0.0 on the Ollama server so it accepts connections from other machines. Then use that machine's IP address in DocuMan's AI connection (e.g., http://192.168.1.50:11434).
Cloud AI Processing
If you prefer not to run AI locally, DocuMan also supports cloud AI providers. Cloud processing offers higher accuracy on complex documents and requires no local GPU hardware. Add a cloud provider as an AI connection in Administration → AI Connections with your API key.
Cloud processing sends document content (image or OCR text) to the provider's API. If data privacy is a concern, use the self-hosted Ollama option instead.
Configuration Reference
AI Watch Folder Settings
Configured in Cabinet Settings → AI Settings → Watch Folders.
| Setting | Description |
|---|---|
| Source Path | The server directory to monitor for incoming files. |
| Target Cabinet | The top-level file cabinet. The AI determines which folder within this cabinet to use. |
| AI Connection | Which AI connection to use for processing documents in this watch folder. |
| File Pattern | Glob pattern for file types to import (default: * for all files). |
| Poll Interval | How often to check for new files, in seconds. Default is 60. |
| Delete After Import | Remove the source file after successfully importing into DocuMan. |
| Active | Toggle to enable or disable the AI watch folder. |
Cabinet AI Filing Settings
Configured in Cabinet Settings → AI Settings → Filing.
| Setting | Description |
|---|---|
| Folder Structure | Existing Folders (AI picks from what's there) or Template (AI creates folders from your pattern). |
| Folder Template | Template mode only. The folder path pattern using tokens (e.g., <Company>/<YYYY>). |
| Filename Template | Optional template for renaming files (e.g., <Company> - <DocType> - <Date>). |
| Auto-Approve Threshold | Confidence score (0–100) above which documents are filed automatically without review. Default is 75. Set to 0 to disable auto-approve and review everything. |
Back to: Documentation Overview • Previous: Watch Folders